Sunday, April 18

How I save $100s and dye my hair for $15!

I have dyed my hair for years. I got my first grey hair when I was 12. It wasn't a short little thing, it was a long hair that had been their for over a year, I just didn't notice it.  I managed to get away with pulling hairs out until my mid 20s, after that I experimented with henna, streaking and leaving it to see if that looked cool on a 26 year old. To be honest I don't think anyone really noticed the odd white hair except me!  But in my 30s my grandmothers Cruella De Vil white streak appeared as my red/brunette hair lost it's color.


That was it, I was destined to dye my hair for the rest of my life, or until all my hair turns white.  I think that would be sort of cool, but for now I am a strange calico mix and dye my hair every 4-6 weeks.


If you're going to dye your hair on your own you really need to find a dye that doesn't have ammonia.  In a beauty salon someone is catering to your every need and it is probably a large building that has a lot of air circulation.  In your home beauty salon, you're on your own and probably in a small bathroom that will very quickly fill up with noxious fumes. I use a no ammonia, no resorcinol, no paraben natural dye.  Don't assume that natural dyes won't work as well.  The one I use is permanent and covers 100% grey hair very well.

First and foremost, follow the instructions provided in the box of dye - my notes below are only  to accompany their instructions and make the experience a little bit easier and more pleasant.

The key to dying your own hair is preparation.  Preparation so you can work fast and not have the dye on your hair too long.  Preparation for when you need to keep your eyes closed.  And preparation so you don't accidentally dye something important.  You will need the following;
  • Gloves - generally the ones provided with hair dyes are not very good, I would suggest you invest in a box of latex gloves - you can use one pair when applying dye and another when rinsing the dye off in the shower.
  • Exfoliating sponge to scrub off any stray dye from your skin
  • Old comb for parting your hair - I don't care how careful you are it will get covered in dye 
  • Shower cap - if you travel the nice hotels always provide them, if you don't have one, an old plastic grocery bag will do the trick!
  • Newspapers to cover your sink area and cabinets - use tape to keep it in place
  • Old towels to put on the floor - you'd be amazed where the dye can fly
  • Old bath robe to wear while you're waiting for the dye to develop - old because the shower cap may not stop dye from dripping on your shoulders

 I try and wear dark clothes so if any dye drips it doesn't matter.  Also bear in mind that after the dye has developed you're going to get in the shower - so wear clothes that are easy to remove, that don't need to go over your head.   That may seem very obvious, but believe me, it wasn't the first time I dyed my hair ;-)

Before I start I always put the conditioner from the hair dye pack and buff puff in the shower - there's nothing worse than trying to find that stuff after you have rinsed your hair and still need to keep your eyes tightly closed.


Okay, so you've done your prep, open the dye box and put the conditioner near the shower, check and see if the plastic bottle (that you mix and dispense the dye in) has a removable top or if you will need scissors to cut a hole after you have mixed the two solutions.  Okay, your ready, put your gloves on and mix the dye according to the instructions provided.

I part my hair down the middle and apply a long line of dye from my forehead to the back of my head.  I dab the dye so it covers the hair above and below the parting.  I then part my hair half an inch to the right of the last parting and do the same until I have covered one side of my head.  I then go back to the top and do the same for the left side. I try and keep my left hand on my head and feel where I make the parting, with my right hand I apply the dye and use my left hand and thumb to guide where I need to put the nozzle of dye bottle.

Once I have applied dye to all the root areas, I rub my head to squash the dye around and make sure I haven't missed any grey areas.  To make sure I add enough colorant, I squirt some of the remaining dye into my hand and draw it through my hair from scalp to hair tip and rub my hair again.  I do this on the right, left and back of my head and make sure I don't miss areas behind my ears and the back of my neck.

Finally I squeeze a line of dye round my hairline paying attention to the areas near my ears and temple, as they tend to have more grey. I smudge the dye in and check for any uncovered grey areas.  Next I wrap up my hair and shove it into a shower cap.  If you have thick hair use a hair band to keep your hair in place.  Remove your gloves, set your timer according to the instructions, put on your bathrobe and take it easy.

If you have had your hair dyed professionally before you will have an idea of how your hair takes to dye.  My hair is fine and soaks up dye very fast (being fine it also takes a perm fast), so I reduce the development time.  If you know how long your colorist leave your dye in, follow those guidelines, if you have no idea, follow the instructions; you can adjust the duration the next time you do your roots.

When your timer goes off, go directly back to the bathroom, do not pass go, do not collect $200.  Turn on the water in the shower to the correct temperature before you get in - you are going to have your eyes closed for the next 15 minutes so you won't be able to see the dial to adjust it. Immediately remove all clothing and get in the shower.  Remove your shower cap and bend over with your head down so the water washes from the back of your neck down to the top of your head and through your hair - do not open your eyes. Massage your hair with your hands for 5 minutes - do not open your eyes. Squeeze the water from your hair and keeping your eyes closed stand up straight and let the water hit your forehead and run down your head and back.  Stand there for another 5 minutes massaging your head and squeezing out the water. Before you open your eyes let the water run over your face and forehead hair line for a few minutes.  Next add the conditioner and leave it in for as long as directed - this can be as long as 10-15 minutes.  To pass the time, I get a soapy buff puff and scrub around my hairline, behind my ears and neck to remove any dye that dripped or was on my scalp during the development time and may have discolored my skin - if you do it now it will come off quite easily.  I also use this time to remove hair and use scrubby exfoliating brushes and creams....not only will you look great you'll feel great and your skin will also be very happy!


Finally, rinse out the conditioner, rinse out the bath and dry your hair using a dark towel, there shouldn't be too much dye left, but it's better to be safe than have brown streaked towels. 

Style hair and check for masking of Cruella DeVil streak :-)

Friday, April 16

The "Solar Installation" Story

 I work from home, so it is very handy when we need to have a workman or someone round to the house during the day. I don't need to take any time off work, I'm around if they need something, and for the most part I go back to my home office and work as usual.  So, when we scheduled the installation of PV panels on our roof I didn't really think about it.  They said it would take 2 and a half days, so it didn't seem like a problem, all I had to do was let the installers know we had cats so they closed the doors when they came in and out.

On Day 1 three vans arrived at the house and I think about 5 guys...I'm not really sure.  They needed access to the attic to attach the panels, but also access to the basement where the inverter and hook up to our electricity box thingy.  Two ladders came off the vans and were propped against the house and most of the men went on the roof. Then the hammering and drilling started.  My office is upstairs just off the master bedroom, so I was pretty close to all the hammering, and I can tell you it was very loud.  The sound filled the attic and it seemed as if all 5 men where hammering and drilling holes right above my head - I was convinced I was going to see a hole in my office ceiling.  I checked the roof at lunch time and all I could see were little brackets all over the south facing side.  That was a lot of hammering for some tiny brackets.

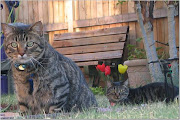
After lunch the noise continued and the cats spent most of the day under the bed.  Butch took it pretty hard and never left the bedroom all day.  Ella didn't like the noise but it didn't seem to freak her out as much as it did Butch.  She ventured out of the bedroom to see if any of the nice men would rub her tummy, when they ignored her and kept working she came back and took advantage of the bed that was unusually Butch-free.

Day one ended with all brackets attached to the 3 areas of our south facing roof.  It was great to see the progress and the fact that the main attachments were installed. May be the next day wouldn't be quite as noisy, I had a few conference calls lined up and I really didn't want the noise to be heard; I pride myself if being able to do anything work related from my home office rather than a company office. 

On Day 2 three vans arrived at the house and I think about 5 guys...I'm not really sure.  The men went on the roof and started making the same noise they'd made the day before. The cats freaked out again and I got lucky as my conference calls were at times when they weren't trying to break into the house via the roof.  The men also started using the garage as a staging area for constructing the rails to hold the PV panels.  They also put all 18 panels in the garage too.   It was very exciting to finally see the "actual" panels. Unfortunately no panels were on the roof by the end of day two, on the bright side all the rails to hold the panels had been attached to the brackets on the roof....hang on a minute...didn't they say the whole installation would take two and a half days? May be they can get all the panels installed the next day.

On Day 3 three vans arrived at the house and I think about 5 guys...I'm not really sure.  Unlike the previous two days the weather had changed from a brisk April day in Colorado to a snowy day in Colorado.  We had 3 inches of snow in the back yard, on the grass and, ahem, on the roof!  As before, two ladders came off the vans and were propped against the house and most of the men went on the roof. It was at that point the other homeowner started to worry about liability and what happens if one of the men slides off the roof.  The men went for breakfast and we called the company and eventually got through to their attorney who was able to direct us to the appropriate paragraph in our contract. Nevertheless, the men should be using harnesses and be attached to the roof on a day when it's probably quite slippy up there, so we mentioned that.  The guys came back with ropes and harnesses, the two ladders were propped against the house and most of the men went on the roof. By now it was mid morning and it was very evident that the panels wouldn't be on the roof by noon.  On the bight side, it turned into a beautiful sunny Colorado day and most of the snow melted off the roof by lunch time.

The noise was the same as the two previous days with a little more drilling so the wires from the 3 areas of the roof could be connected and run down to the basement to the inverter. There were men in the attic, on the roof and in the basement.  Both cats were freaked out and were once again prisoners in the bedroom.  The drilling seemed to scare Butch more than the hammering, or may be it was just the change in the noise.

He jumped on my desk and tried to hide behind my laptop and monitor, looking scared and totally freaked out I put a basket on it's side so he could hide and sit close to me. We both looked at the ceiling when the noise seemed to get closer, but eventually it stopped and the men left for the day.

Day three was not as productive because of the snow, so not all the panels were installed on the roof. I believe a lot of the wiring and inside work was done, so we had hope that there was not too much more to be done.

On Day 4 three vans arrived at the house and I think about 5 guys...I'm not really sure. The panels were all secured onto the roof by lunchtime.  The rest of the day was spent finalizing the wiring and making sure all the equipment was installed in the basement and working.

The cats were beginning to look like they thought all this noise and people running around the house was going to be the new normal.  I have to say, by day 4 I was over it too.  The men were all very nice and polite, but I was ready to get my house back to normal sound levels. Day 4 was a long day and went beyond the normal 4:30 pm finish, luckily a friend called and I spent 2 hours chatting and drinking wine.  The weather was nice and I sat outside for most of the call, something I hadn't been able to do because of the noise and I felt a little self-conscious out there with 5 men looking down. By 7 pm the last man was packing up, shaking our hands and preparing us for the next part of the process.

We were provided with a plug thingy that apparently monitors our solar power generated and hooks up to the Internet so we can see power usage from the grid against what we generate.  We were also told that before we could turn our panels on we needed to get the City to certify the work, and then have our energy provider connect our solar system to theirs so we can sell back any unused solar power.

I seriously think in the hot Summer months and cold Winter months we will use all our power generated and more, so we won't be selling anything back to the energy company.  I guess we'll have to wait and see.

Tuesday, April 13

Healthy Nut Recipies


I've mentioned before how Cashew Cream has changed my life and thought I should document some of my recent recipes here - http://www.talronnen.com/recipes/cashew-cream/
+ I've used in Pumpkin pie when it asks for cream - straight volume replacement
+ Used in curries when it asks for yogurt at the end
+ Used in tomato bisque, but could probably be added to most soups at the end to make them creamy
+ I will try it in mashed potatoes next week and let you know
+ Tal Ronnen also has a a cashew cheese recipe that I am addicted to (my husband hates it) - I add a cup of water when I'm grinding the cashews to make it more like a dip - I also add garlic salt instead of sea salt.

Elana's site has gluten and dairy free recipes (it's a good site for me since I avoid gluten and I actually feel a lot better if I avoid dairy too) :-)  She has a fantastic Almond Flour book, but her cashew recipes are pretty good too!
Home made cashew milk is pretty darn good on cereal!
+ I think she makes some of her stuff a little too sweet so I omit the stevia in the cocoa recipe and sweeten to taste with agave
+ Homemade almond milk is good to drink (much better than store bought); we drank so much almond nog over the holidays!!!
+ I made this one time using apple pie spice, yum!  You can also replace the yacon syrup with agave (yacon is silly expensive, but worth it if you can afford it)
This is an Almond Muffin recipe that I've modified below - I eat an almond muffin each morning around 10am and it stops me snacking on salty and sugary stuff - it's almost a diet aid!
My substitutions -
+ Replace 1 stick of melted butter with 1/3 cup olive oil (can use as little as 1/4 cup for lower fat version, but make up the volume with water or apple sauce)
+ I have used agave to sweeten, but I prefer 1 tablespoon of SteviaPlus (or the equivalent of 1/3 cup sugar - there are some different Stevia mixes going around and if you add too much it can make the muffins bitter - stevia has no calories so this option brings the calories down)
+ You can just use egg whites if cholesterol is an issue (4-5 whites)
+ You can mix nut flours, I have used half almond and half hazelnut - that goes really well with the Nutella topping suggested below :-) You need to grind the nuts since I've never seen ground hazelnut flour - freeze the nuts overnight and grind in processor for 5 mins - freezing allows the nuts to grind better and prevents clumping due to nut oils (which are frozen), it's also really loud!!!!  You can do the same and make you're own almond flour since it's not the cheapest flour on the shelf - I sometimes use regular, unbalanced almonds since blanching is such a pain -the upside is it increases the fiber in the muffins :-)
I also learned that if you do want to use blanched almonds, boil the almonds in water for 1 min, drain and let cool and they should squeeze out of their casing pretty easily
++ use cake cups - they'll stick in the muffin pan no matter what you do!
Additions -
+ 1 tbsp dried lemon peel and 1 tbsp poppy seeds or chia seeds (they are so good for you)
+ Fresh blueberries sink to the bottom so I use freeze dried ones from Whole foods and add 1/3 cup water to the batter
+ Swirl some agave on the top before baking
+ Add a dark chocolate drop (or 1/2 tsp Nutella) to the top of each before baking
+ Add powdered green tea - since Japanese women don't get breast cancer they suggest drinking 3 cups of green tea a day - the best is supposed to be Matcha, so I add a tablespoon to the almond flour before adding the wet ingredients - it gives them a green hue :-)

Friday, April 2

Solar - It was only a matter of time

As long as I can remember I have wanted solar.  Even as a teenager when I'd never seen a real live solar panel, I knew it was a darn good thing.  There was really bad smog in London in 1952 (The Big Smoke) and there is still acid rain in Europe due to pollution from Northern European power plants that causes acidic rain to fall on Scandinavia and kills a lot of their pine trees among other things. I think most Europeans are more accepting of climate change because we have seen the affects of pollution for many years. As a kid we were always bombarded with Keep Britain Tidy signs; they are an independent organization that started adding a Tidy Man logo on all trash bins and packaging in the early 70s. This environmental group very gently brainwashed me to have an appreciation for my environment and to be totally disgusted by anything that harmed my surroundings.

Now I understand that that CO2 is harming my environment - whether you believe it is caused by man or natural - I can reduce my carbon footprint and help the cause in a small way. As a homeowner I have some control and can have solar panels put on my roof. There are tax rebates to help off-set some of the cost, it's now affordable (for some) to have photovoltaic panels installed on a south facing roof.  There are also buy-back schemes where unused energy can be sold to the local power company. Don't get me wrong, it will be a long time until we get our money back - some estimates say it could take 10 years...and as far as selling unused energy back, we calculate our 18 panels will cover 50% of our use.

Whatever, it will help reduce our carbon footprint.
Installation is scheduled for next week!!!!!